Advanced call flows let you build custom call routing for your business, including dial menus, call queues, diverts, voicemail, and more. This article explains how to create and configure an advanced call flow in the MybOnline portal.
Please note: Activating the Advanced Call Flow add-on includes a one-month free trial, followed by a monthly subscription fee of £3 plus VAT.Start a new advanced call flow
Log in to the MybOnline portal.
Select Phone settings, then Call flows.
Select Create an advanced call flow.

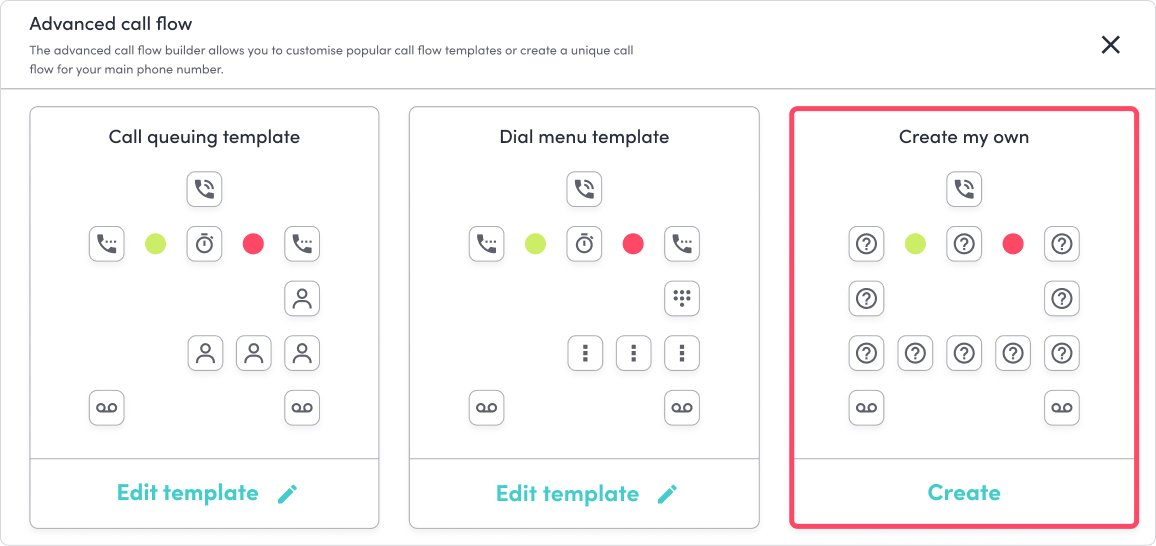
Choose a template
Select one of the three templates:
Create my own: a fully custom flow.
Dial menu: "Press 1 for Sales, Press 2 for Support".
Call queuing: hold callers in a queue with hold music.
Name your call flow
Give your call flow a name in the top-left of the screen. The name will appear in the All call flows section so you can identify it later.

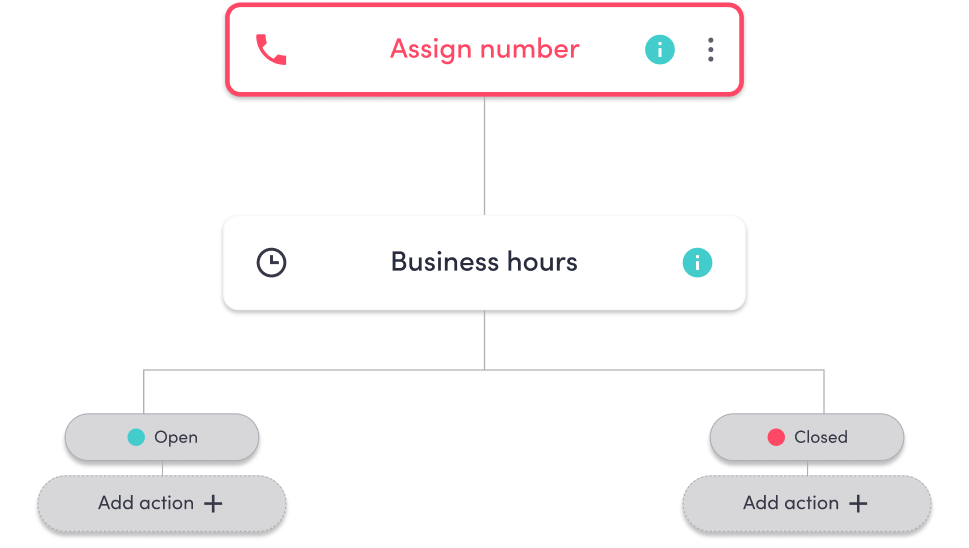
Assign a Phone Number to the Flow
Every call flow needs its own number.
In the flow you’re working on, select Assign Number.
Choose from your list of unassigned phone numbers.

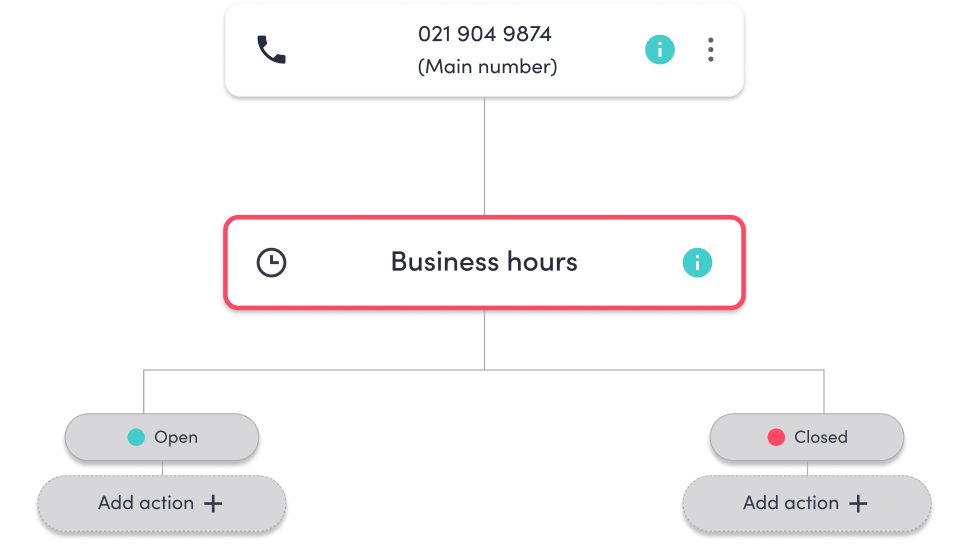
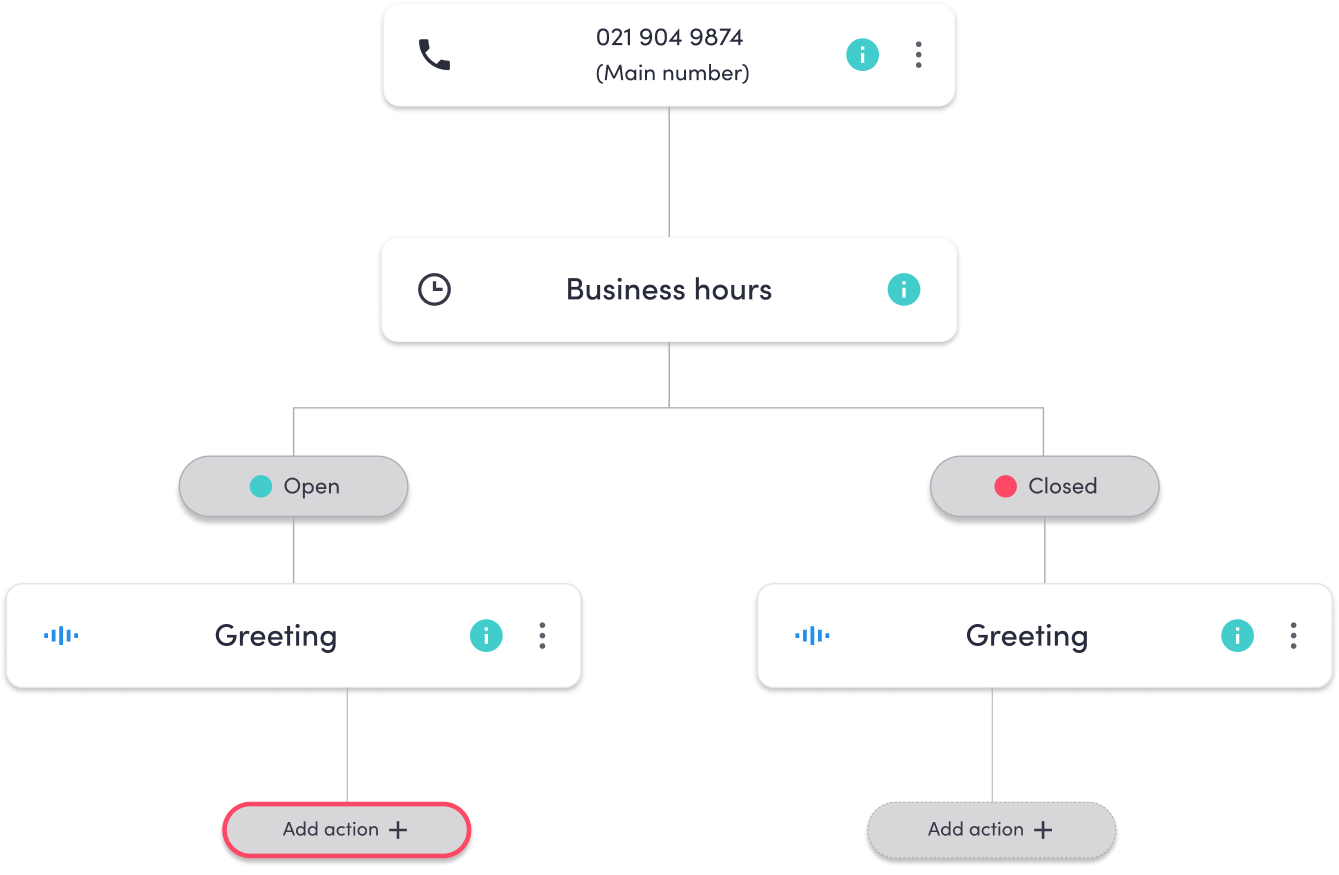
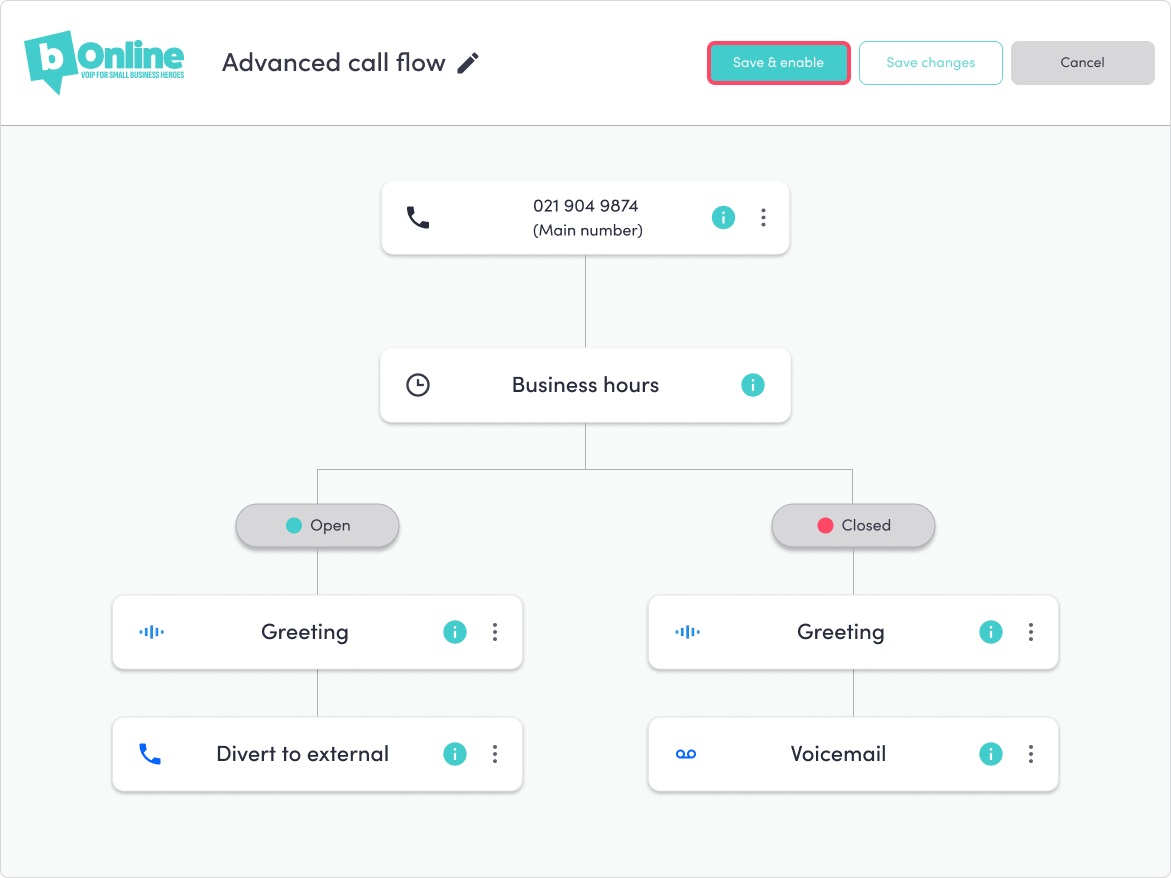
Important: You cannot assign a number that is already linked to another active call flow. If a number is in use, it must be unassigned first. Once assigned, you’ll see the number appear clearly at the top of the flow.Set your business hours
Select Business hours and choose either a pre-configured option or set your own.
You can add breaks during the day and apply your configuration to multiple days at once. Select Save when done.

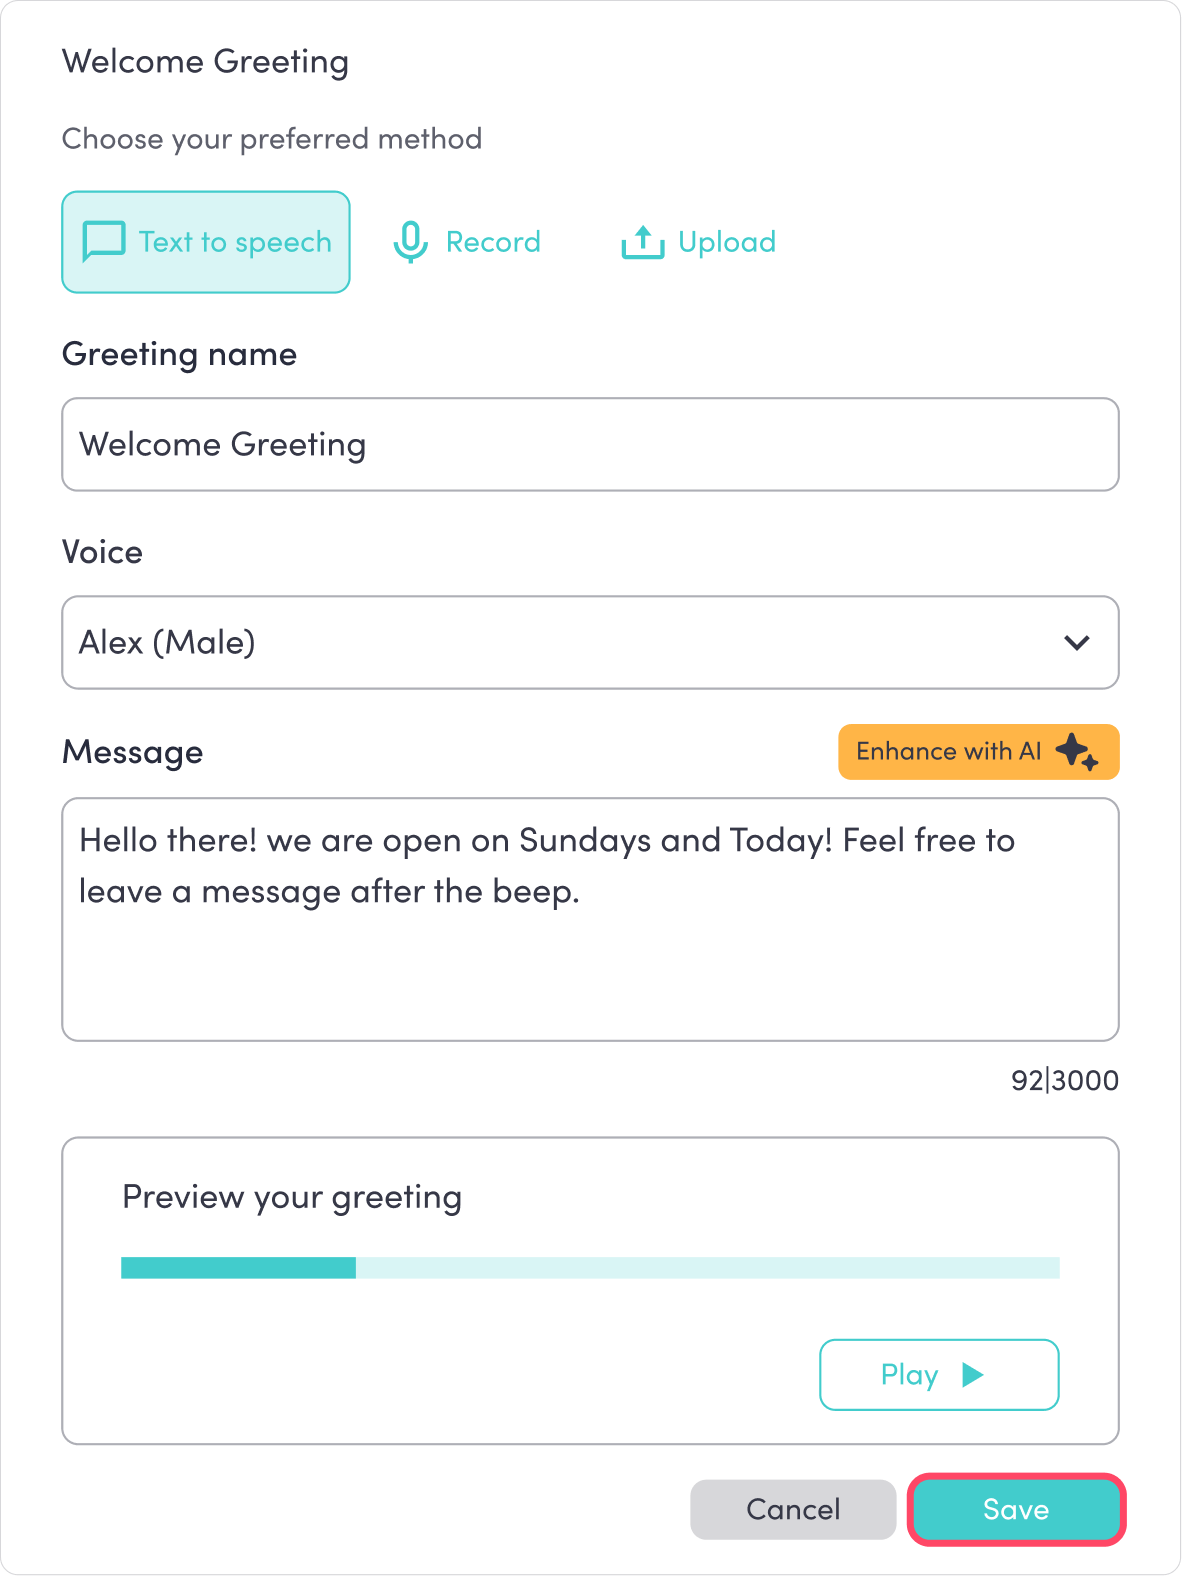
Add a welcome and closed greeting
Configure greetings that callers will hear when calling your business in or out of hours. See How to set up welcome and closed greetings in MybOnline.
Select Add action + underneath Open.
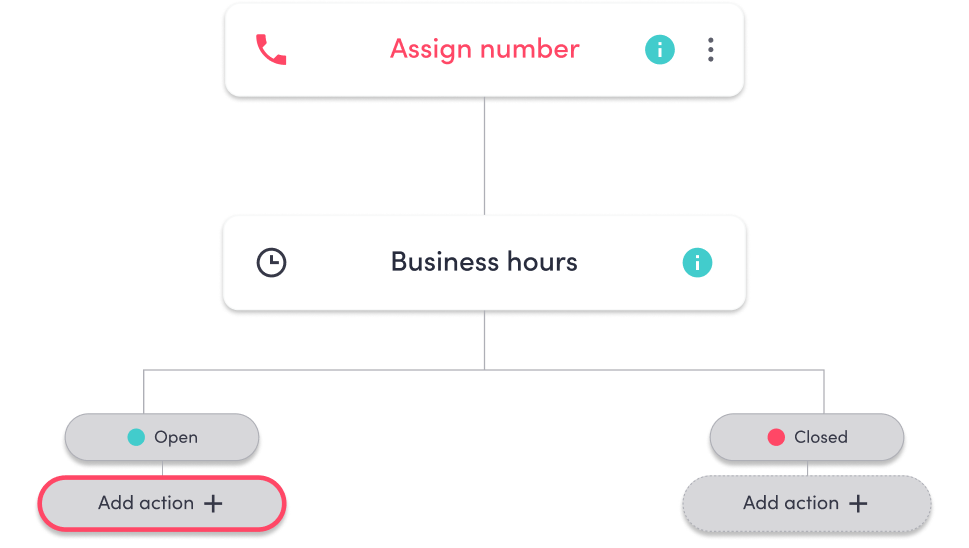
In the pop-up, select Greeting.
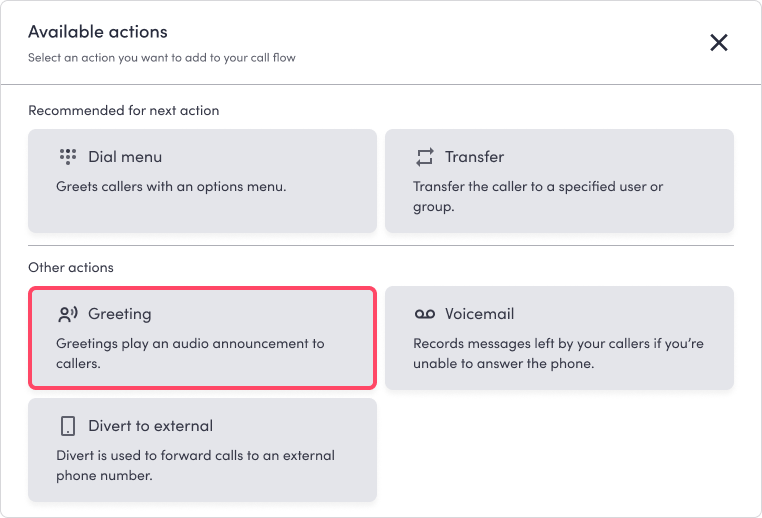
Create or upload your greeting, listen to it to confirm, then select Save.
Please note: You must create both a welcome and a closed greeting before you can save and enable your advanced call flow.Build your call routing
After your greetings are set, select Add action + underneath the open greeting to build the rest of your call flow.
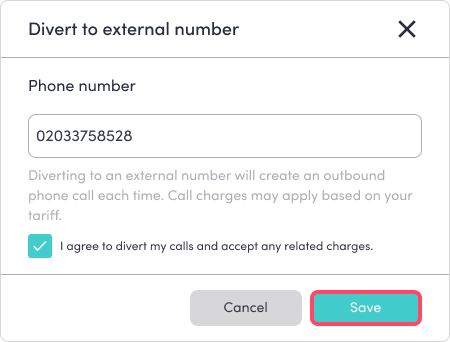
Choose any action to build your call flow. For example, to divert all incoming calls to an external number, select Divert to external.
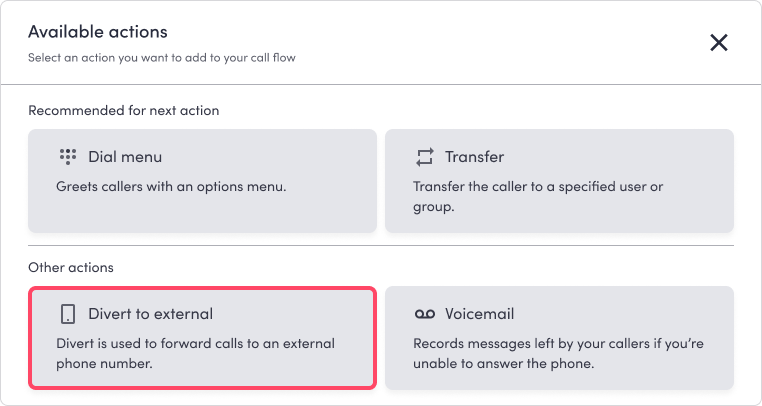
Enter the number you want calls diverted to, accept the charges, and select Save. Just like a temporary call divert, call charges may apply based on your tariff.
Save and enable
Once your call flow is complete, select Save & Enable to activate it.
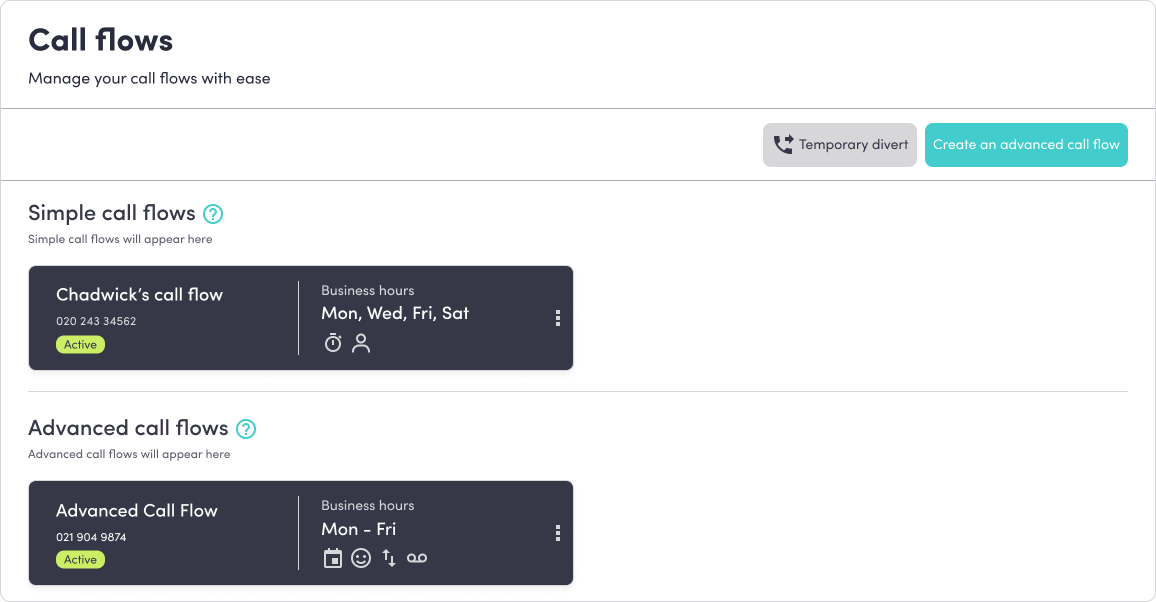
Manage your call flows
All call flows you create are stored in the All call flows section of the Call flows page. From here you can enable, edit, and delete call flows.
Video guide
Watch the video below to see how to add and configure a CRM integration in the MybOnline portal.
Contact Us
We're always up for a chat! Live chat is available via the mybOnline sidebar or from the bottom-right corner of this page.
Please note: This is the fastest way to reach the support team.
Other Contact Options
WhatsApp
Reach the support team via WhatsApp for quick queries.
MYbOnline Portal
Log in to mybOnline and use the in-portal contact options.
Related articles
Was this article helpful?
That’s Great!
Thank you for your feedback
Sorry! We couldn't be helpful
Thank you for your feedback
Feedback sent
We appreciate your effort and will try to fix the article